


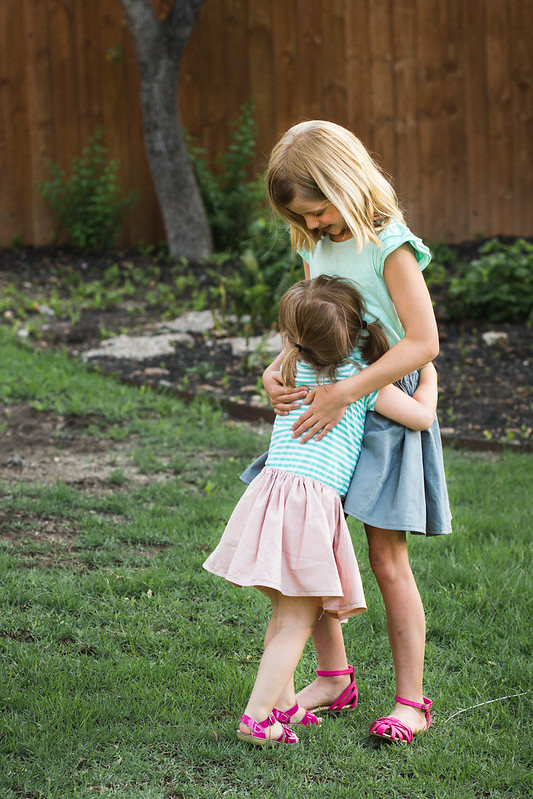
I like that this skirt works for both toddlers and older girls. I like the shape and the amount of gathering. I did a quick tutorial search and didn't see anything out there so here is my way of re-creating something similar.

I knew I wanted a fair amount of gathering created by the elastic. So I started by cutting two rectangles for the front and the back of the skirt.
Here's the formula I used for the size 7 skirt. I think this would work well for sizes 5 and above, or if you want a lot of gathering on a smaller-sized skirt.
Rectangle Width = Waist Measurement x 2
Rectangle Length = Measurement from belly button to just above the knee + 2 inches for elastic casing and narrow hem
For Indigo's skirt, my two rectangles were 42" in width and 17" in length.
Since Iris is only 2 1/2 I didn't want to use that same formula for her skirt because I felt it may have been too gathered at the waist. However, if you are looking for a lot of gathering, I would recommend the formula above (waist measurement x 2).
For her size 2 skirt my formula was:
Rectangle Width = Waist Measurement x 1.5
Rectangle Length = Measurement from belly button to just above the knee + 2 inches for elastic casing and narrow hem
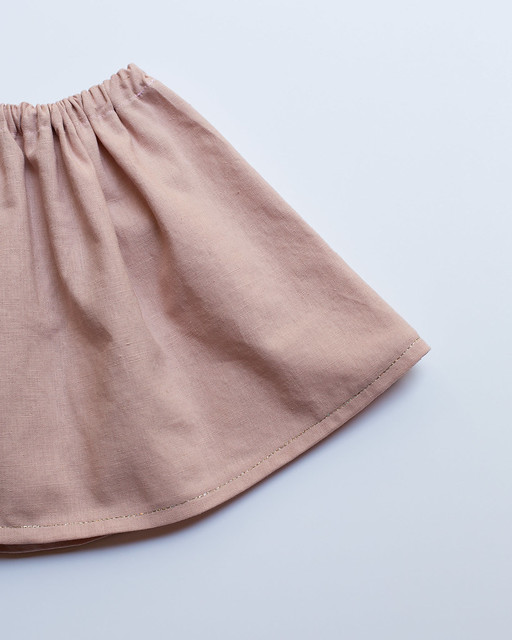
For Iris, this worked out to be 28.5" in width and 14" in length. Her finished skirt looked like this on.
If you'd like more gathering than this, just multiply the waist measurement by 1.75 or 2.
For sizes 3-5, I would probably use the waist measurement x 1.75.
If you'd like more gathering than this, just multiply the waist measurement by 1.75 or 2.
For sizes 3-5, I would probably use the waist measurement x 1.75.
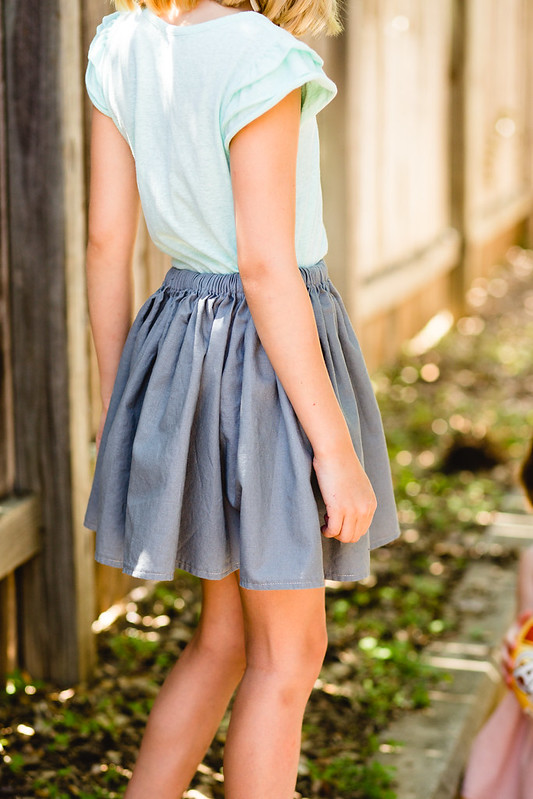
If you stopped here, you would have a skirt that was twirly, but had quite a lot of bulk at the hips. I wanted to reduce this bulk by creating an A-line shape.
With my rectangle folded in half width-wise, I angled my straight edge to create an A-line shape. For The size 7 skirt, I took off 3 inches of the top outer edge of the skirt, the side opposite to the fold. For the smaller skirt, I took off 2 inches at the top outer edge. For an in-between size, I would have done something in-between. I did not reduce the width on the bottom at all.


To give the skirt a little more shape, with the rectangle still folded in half, I found the bottom middle point and, again using my straightedge, angled it up by 1/2".


Unfolded it now looks like this.

Then I sewed the front and back pieces of the skirt together at the sides. I finished the seams with my serger (or you could use a zigzag stitch).
Then I sewed the front and back pieces of the skirt together at the sides. I finished the seams with my serger (or you could use a zigzag stitch).
Next I created the casing for the elastic. I ironed the top edge over by 1/4" and then again by 3/4" to create the casing for my 1/2" elastic. I edge-stitched the casing leaving 2 inches open to thread the elastic through. I usually cut my elastic length equal to the waist measurement but then I always try on to check the fit. Oftentimes, I have to tightening the elastic by a couple of inches. It varies depending on the elastic I'm using as well.
I created a narrow(ish) hem, also trying on the skirt first to evaluate the fit. In this case, I ironed the edged under by 1/2" and then again by another 1/2".
I decided to use metallic thread for the topstitching (my inspiration skirt had a mustardy gold thread for topstitching). Based on the advice of my friend Kristin, I used it for the top thread only and not in the bobbin. She commented that metallic thread can break easily and while I did not experience that my first time using metallic thread, I did this time. So I was very thankful for her advice. I stitched over the first row of topstitching one time to make it a little thicker and more noticeable.
(For more in depth instructions on sewing a skirt, the Oliver + S Lazy Days skirt pattern instructions are fantastic, as are all of their instructions!).
And there you have it. A simple summer skirt.
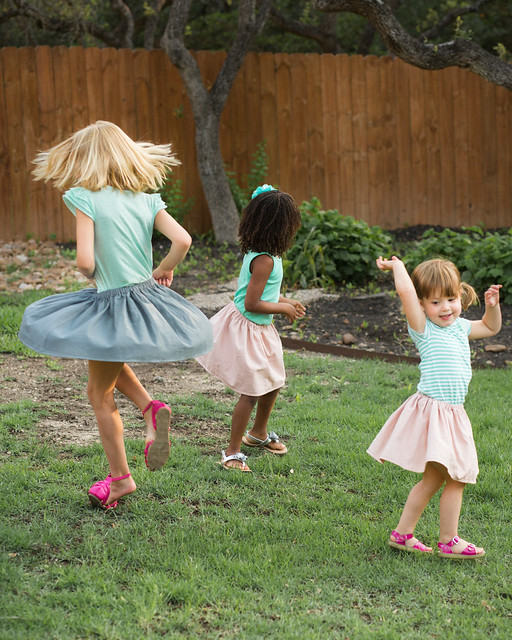
Great for dancing
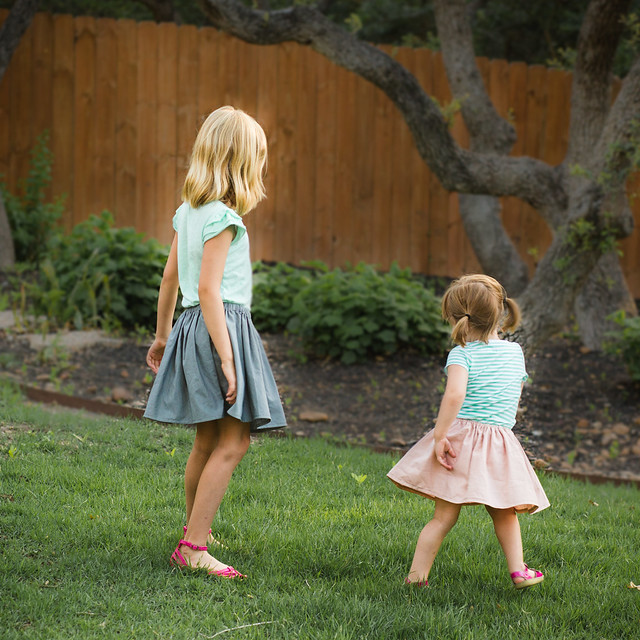
and twirling, too


I love, love, love the inspiration skirt with the little bows at the side. I hadn't known those basic skirt-shaping ideas, but that makes so much sense. Thanks for sharing!
ReplyDeleteWhat a great tutorial! I look forward to giving it a try! And I love that original skirt, too! It looks like such a soft fabric.
ReplyDeleteThe skirts are gorgeous Rachel. They are a lovely shape and well done on figuring it all out yourself.
ReplyDeleteYou know what works well for the topstitching is to put some of the metallic thread onto a bobbin, mount that on top of the sewing machine and then thread the machine with both threads as if they were one. Then you only have to stitch once but get the double thread oomph. I've done it with three threads too!
I did consider doing it that way, but I was having so many issues with the metallic thread this time. First, Iris had messed with my machine tension and that was causing the thread to break. But even after I corrected that, the thread probably broke 6-9 times. I re-threaded the machine, changed bobbins twice, and finally changed my needle and then it was smooth sailing. Kristin had mentioned that metallic thread breaks easily so I just didn’t want to push my luck by double threading my needle. :) But I think that would be a great way to do it with regular thread!
Deletethis skirt is lovely and poofy and all kinds of good!! Thanks for sharing! :)
ReplyDeleteAw, thank you so much, Jane!
DeleteSo something else you are talented at . . . writing sewing tutorials! This is great! I love the clear pictures along with detailed instructions and numerical guidelines. Very thorough and helpful. One can only hope there are more equally awesome tutorials in your blog future. . . except your hands might be full(er) again quite soon:)
ReplyDeleteThank you so much, Lucinda. If there was a 'most encouraging person in the world' award it would definitely go to you! :) And your sewing is amazing!
ReplyDelete